How to Add a One-Click Upsell and Downsell in Clickfunnels 2.0
Add one-click upsells and downsells to your Clickfunnels 2.0 funnels to offer customers a smooth buying experience and increase the average order value.

In this article, you'll learn how to set up one-click upsells and downsells in Clickfunnels 2.0 to offer customers a smooth buying experience that encourages them to add more to their order.
Creating a seamless, one-click upsell and downsell process is a powerful way to maximize revenue from each sale within your funnel.
When customers are offered complementary products or additional offers after they’ve committed to an initial purchase, they’re more likely to add these options to their order, increasing the overall order value.
Why Add One-Click Upsells and Downsells?
Using one-click upsells and downsells in your sales funnel built in Clickfunnels 2.0 can substantially impact your revenue. Here’s why they work so well:
- Higher average order value: Offering related products or upgrades right after the initial purchase allows customers to expand their orders with minimal effort, increasing the total sale amount.
- Effortless buying process: Because Clickfunnels 2.0 stores customers' billing information they entered on the order form, they can add upsell and downsell products to their orders without re-entering their payment details.
If you don't have a Clickfunnels 2.0 account yet, you can take advantage of our extended 30-day free trial! Normally, Clickfunnels offers a 14-day trial, but with our exclusive link, you can double your trial period at no cost and explore the platform for a full month.
How to Add a One-Click Upsell in Clickfunnels 2.0
Clickfunnels 2.0 uses the Checkout element that you'd usually use on the order form for upsell and downsell pages. You can either watch our step-by-step video tutorial that will show you how to create one-click upsells and downsells or follow the steps described below.
Before getting started, you will need to have the following:
- a funnel with an order form and an order confirmation page
- an upsell product and a downsell product (if you also want to add a downsell to your funnel)
1. Create an upsell page
Go to your existing funnel in Clickfunnels 2.0, where you should already have an order form where you're selling your main product and an order confirmation page. If you haven't done it yet, add an upsell page to your funnel.
2. Attach an upsell product to the upsell page
- From the funnel page, open the actions menu of the upsell step and select Add Products.

- In the menu that will open, click Add Product and select the product you want to offer on your upsell page.

3. Add the Checkout element to the upsell page
- Open the upsell page in the page editor and add a Checkout element. Make sure you select the standard Checkout element and not the legacy version.

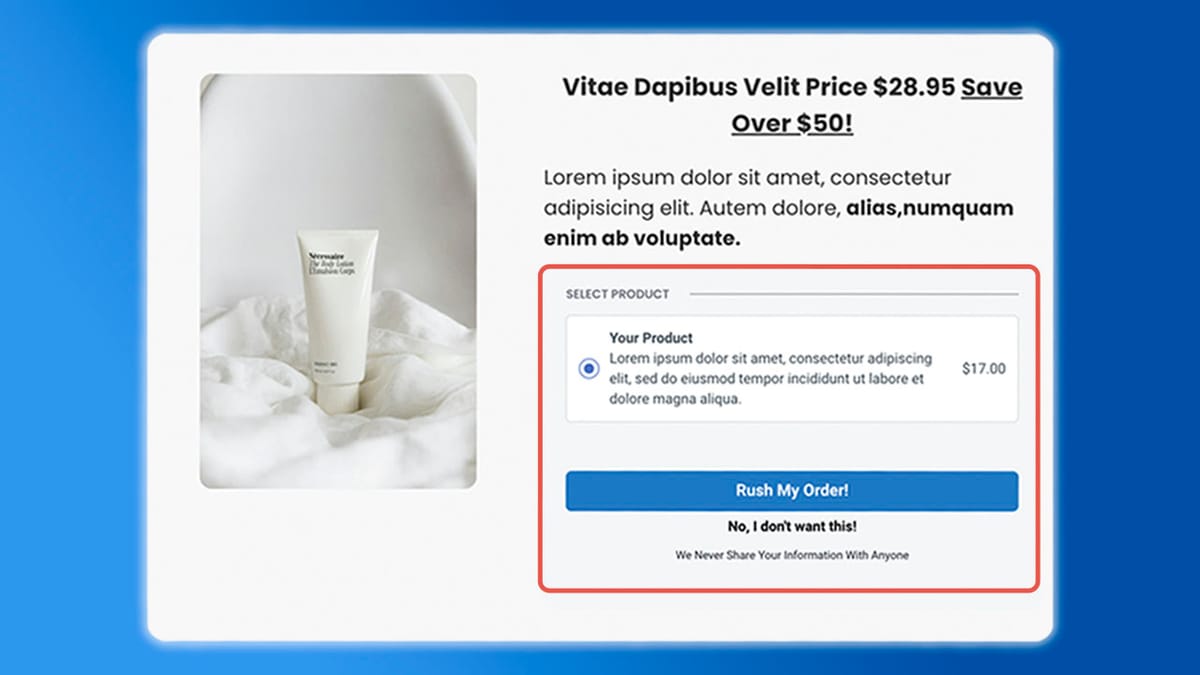
- You do not need to update the fields of the Checkout element. The Checkout element that you add to the upsell page in Clickfunnels 2.0 will automatically detect if we already have the billing information from the customer on file because they provided it on the order form. If so, the Checkout element will automatically be shown in the One Time Offer mode.
To preview the Checkout element in the One Time Offer mode, open the settings of the Checkout element and select One Time Offer in the Checkout Preview dropdown.

- (Optional) Using the templates and settings, customize the look of the Checkout element to align it with your brand colors or styling.
4. Add a "No-Thank-You" link to the upsell page
- While you don't need to change the fields of the Checkout element, the one thing you need to do in the Checkout element's settings is add a "No-Thank-You" link. Your customers will click this link if they don't want to add an upsell product to their order and will be redirected to the next step in your funnel.
- To do that, in the settings of the Checkout element, go to the Buttons section.

- Enable the toggle for the downsell link, and edit the link text.
By default, the link will send customers to the next funnel step. If you want to redirect customers who declined the upsell to a different page, paste the link to this page in the Link action or URL field. Save the changes you made on the page.

- If you want to change the color of the "No-Thank-You" link, you can do it in Settings > General Styles > Link Color.
5. Testing
With that, the upsell page is set up! Now, you can test the flow to ensure everything works smoothly. Here’s how to do this:
- Preview the order form page of your funnel, fill in the information on the order form, and enter the test billing information to simulate a purchase of the main product. In case of a successful transaction, you should be redirected to the upsell page.
- On the upsell page, verify that you don’t need to re-enter billing information and that the Checkout element only shows the upsell product, a button, and a "No-Thank-You" link. Try adding the upsell product to your test order to see if it correctly redirects you to the order confirmation page. If everything works as expected, your upsell page is ready.
If you only want to have an upsell page in your funnel, your setup is ready. However, if you want to offer a downsell product to people who declined the upsell product, you need to add a downsell page following the steps below.
How to Add a One-Click Downsell in Clickfunnels 2.0
1. Duplicate the upsell page
The layout and functionality of the upsell and downsell pages in Clickfunnels 2.0 are similar. That's why you can simply duplicate the upsell page that you have created in the previous steps.
- Open the action menu of the upsell page and click Clone page. It'll create a copy of the page.

- Click the action menu icon of the new page and go to Settings. Rename the page and change the page URL.
2. Attach a product to the downsell page
Follow the instructions that you used to add a product to the upsell page and add a product to the downsell page in the same way.
3. Adjust the funnel flow
Adding a downsell page to the funnel slightly changes the funnel flow. Before, customers went from the upsell page to the next funnel step (the order confirmation page), regardless of whether they accepted or declined the upsell product.
With the downsell page added to the funnel, only the customers who decline the upsell go to the downsell page, while those who accept the product on the upsell page need to be redirected to the order confirmation page.
That's why if you add a downsell page to your funnel, you need to set up a redirect for the button on the upsell page. Here's how to do it:
- Copy the order confirmation page link by clicking on the Copy icon.

- Open the upsell page in the page editor and go to the settings of the Checkout element. Go to the Buttons section of the settings.
- Enable the Redirect Override function and paste the link to the order confirmation page in the field. Save the changes.

- To confirm everything works as expected, conduct a complete test of the funnel. Start with the order form, proceed through the upsell and downsell pages, and finish on the confirmation page. This final testing phase will help you ensure each redirect works correctly and that the Checkout element behaves as expected for each step.
Adding one-click upsells and downsells in Clickfunnels 2.0 allows you to increase average order value while providing a smooth checkout experience to your customers. Following the steps in this article, you can easily set everything up even if you haven't done it before.
If you’ve found this content helpful and would like to support the blog, consider subscribing by clicking here. Your support is greatly appreciated!


